Categories
How To

How to save YouTube videos for free and watch offline later

How to save YouTube videos for free and watch offline

 Yes, you can download videos for free, this article will walk you through step by step process.

Most of us on a daily basis go to YouTube to either listen/watch to music/shows or to learn something new. Well, for you to enjoy un-interrupted services one must have an active internet connection or should be hooked to a Wi-Fi connection.

Well if you are addicted to spending time on YouTube and don’t have the mobile network or Wi-Fi connection.  Don’t worry anymore because YouTube has launched their “Offline” services so that you can download few videos and watch it at the later point of the time. Yes, you can download the videos for free and watch offline later

Prerequisites to use YouTube Offline
  • One should have a smartphone with considerable amount of space
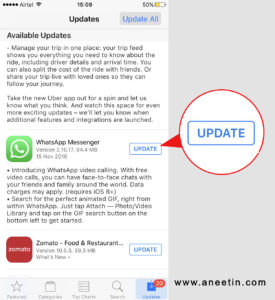
  • One should download YouTube application and should be updated to the current version
  • One should have mobile internet connection (preferably 3G or 4G connections)
  • One should have an active Gmail account and it should be linked to your “YouTube” account
How to use YouTube Offline:
  • To use the option, one has to tap into the YouTube application.
  • Your home screen displays information about the email id that is been used to log into the application.
  • On the screen, you get to see different options
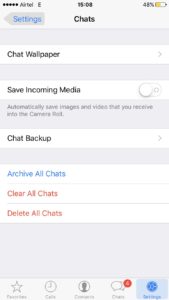
  • Click on Settings option, on the screen to proceed
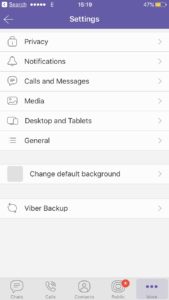
How to enable Offline mode within YouTube:

  • Once you are on the Settings screen, you will be able to Turn On or Turn Off “Offline” mode by toggling ON/OFF button. It is available in the top right-hand corner.
  • Download options: You will be able to determine the download options so that one can effectively utilize their mobile data.
  • Based on your phone memory/ SD card memory, YouTube application will show you the leftover memory space.
How to download Videos from YouTube App:

Based on your browsing, if you want to save any videos, you get to see a downward arrow next to the video title. The user has tap on download button and the video will be downloaded.

How to view Downloaded Videos from YouTube App:

  • For you to access these videos, one has to make sure that their Status is turned on for “Offline” mode. Based on this mode all available videos are displayed.
  • Once you tap on Available videos, a list of all videos are displayed and the user will have an option to play the videos by click on “Play” button.
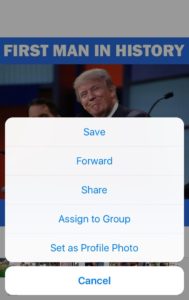
How to remove an existing video from the log:

The user has to tap on the three dots and this will open up an option where the user will be able to delete the video from the log. A confirmation popup will appear for the user to confirm. Based on the option selected video will be removed from the list and left over memory space is refreshed.

Using this option has definitely made my travel entertaining. I was able to save few videos that I watched during my late night bus travels and also I didn’t notice the time. If you have a smartphone and you travel a lot, we recommend you to try this as well.

Share your thoughts and let us know whether it was helpful or not


Categories
Travel

My Visit to Saraswathi Temple in Vargal

My motivation to travel has doubled because I get to capture the moments and also at the same time express the same on my blog. This is my first attempt describing a short trip that I had planned for the weekend with my entire family.

How did I finalize my place firstly?

This is the first and foremost question that every individual will have on his mind when they are ready to travel, but they are unsure about the place and the way. Well, I didn’t want to get stuck with this thought, so I took on to other blogger’s experience and started browsing few articles over the internet and finally zipped through few places where I can travel back and forth in a day and get a good night sleep over the weekend.

So, the first criteria were to find out a place where it is easy to commute and should be less than 100KM drive. Secondly, the place should be in a stage where I would get some crowd rather than going to a remote place as I was going along with the family so I had to look for something comfortable for everyone. I found few places where we decided to try out Saraswati Temple at Vargal. Well, I have heard about this temple from few of my relatives and friends before and this excited me to visit the place and obviously visit the spiritual place.

What is this place famous for?

According to Hindu culture, kids at 2-3 years of age go through “Aksharaabyasa” ceremony and Basara is very well known for it. The same ceremony can be done at Vargal Saraswati temple who are nearby to the place. “Vargal” is known for “Aksharaabyasa” for children and also it is one of the popular pilgrimage sites around Medak and Hyderabad.

How to reach Vargal?

I chose to drive to Vargal from my place as it was more comfortable and also I was in a place where I can use “Outer Ring Road” and skip the traffic. The place was about 90kms from my home and it took me about an hour and a half to reach the place.

How did I pay my Toll Tax?

As everyone is aware of the “Modi’s effect on our currency, all Tolls were not accepting old 500 and 1000 Rupee notes and unfortunately I was carrying few old notes and I couldn’t use it and finally I have tried different options of payment like “Paytm” and debit/credit card swipes and finally I was able to pay my Toll Fee by swiping my Credit Card and experience was wonderful. Being a techie guy I had different plans on my head about automating the whole Toll fee payment process but I held on to that thought and got back to driving.

Roads were really good and at regular intervals, I get to see Signboards and directions to the temple and I found few places where you could stop by for a quick “chai” (i.e. aka Indian Tea) and get going with the driving. I have used Google Maps (Read More: How to use Google Maps offline ) to direct me from my home to Vargal and entire journey was smooth and I didn’t face any signal drop during my travel.

More information about the temple:

I am happy that temple authorities are taking time and making sure that they have an online presence as well and I was able to find all the information related to the temple here

Timings: 6 AM – 12.30 PM and 4 PM – 7.30 PM from Monday to Thursday, 6 am – 2 pm and 4 pm- 7.30 pm from Friday to Sunday. For more information of their website please check their website.

http://www.srivargalvidyasaraswathi.org/

Transport?

Well if you are not driving then you can also use Telangana Bus Transportation which starts at 10.15 AM from Secunderabad and again a shuttle runs from Temple to Secunderabad at evening time around 5.00PM.

My Experiences:

  • If you are traveling with elderly people then I would suggest using Lift’s as this temple is located on the elevated hill and it is going to be difficult for elderly people to use the staircase. Check for the lift instead of taking the stairs.
  • The place is surrounded by Monkey’s make sure that you are not carrying any food-related bags freely. If you have to carry then please go cover them with some sort of a cloth or a bag
  • You get to have fresh air as pollution is not that much compared to urban life.
  • You get to see the big idol of Saraswathi Devi

Please do visit this place and do share your experiences in the comments section. If you have any questions please do comment 🙂

Stay safe and travel a lot 🙂

Categories
AI & Tech

How to Install PMD plugin for Eclipse IDE?

To install the PMD plugin for Eclipse IDE, you need to follow the steps given below:

  1. Start Eclipse IDE and open up a project
  2. Select the main tab Help and then select Software Updates and then finally select Find and Install.
  3. Click on Next and then click on New remote site.
  4. Enter a meaningful name as like PMD into the Name field and this link (http://sourceforge.net/projects/pmd/files/pmd-eclipse/update-site) into the URL field
  5. From here on, you can just click through the rest of the dialog boxes to be able to install the plugin

If the above process doesn’t work for you, then you can alternatively download the latest zip file from the PMD – Source-forge site (https://sourceforge.net/projects/pmd/files/ ) and follow the process given above except for using New local site but to browse to the downloaded zip file.

How to import a Custom PMD Rules set?

 You should be able to import those rules into your Eclipse IDE by following the steps given below:

  1. Go to the main tab Window and then click on Preferences.
  2. Go to the tab PMD and then to Rules configuration in the tree structure that you find.
  3. Click on Clear all to remove any default rule set that comes along with PMD plugin.
  4. Click on Import rule set and then import your rule set that’s been provided to you by your company or client, but be sure to select the option Import by copy.

It would take a little while for your IDE, to process these new rules set that you’ve imported into the IDE. You might be getting an In Progress screen when you close the Preferences screen.

 How to check code with PMD?

To run the newly installed PMD plugin, give any of your project nodes a right click and check for PMD sub menu item on the right-click. Click on it to open up a sub-sub-menu, from which you will have to select the option Check code with PMD.

If you’re not able to see the raised PMD violations then you should be able to see them when you traverse through the following menus on your IDE. Firstly go on to Window menu and then click on Show View to select Others and then to select PMD and finally to select Violations Overview.

You will be able to select or unselect the buttons to show the PMD violations as per the PMD alert priority. Hope that this article helps you get started with PMD on eclipse IDE.

Categories
How To

How to use Google Maps offline?

Have you ever thought of having an option where you can use Google Maps mobile application offline? Yes, without having an active internet connection you can use Google Maps mobile application.

Are you a frequent traveler and rely on Google Maps for your routes?

Do you browse maps to identify a place you wanted to know?

If yes, then this information is available at your fingertips with an active internet connection.

What if, if you want to use Google Maps mobile application to satisfy your needs without even your Mobile data ON?

Sounds interesting!!!!

Let me cut the chase and talk about it so that you can leverage this option and enjoy your travel.

How to use Google Maps mobile application OFFLINE?

Now users can download a particular area of the Map within Google Maps mobile application and store it into your phone memory.The article below will show case the detailed steps to download certain area map data from your Google Maps application and use it in an Offline mode.

Pre-Conditions:

  • You should have an existing Gmail account
  • Gmail account credentials to be used to login into Google Maps Application
  • To ensure that you have the latest Google Maps application from Play Store or App Store
  • Have sufficient memory space.
  • Get connected to a WIFI connection to save your mobile data
  • Should have smart phones or tablets (i.e. iPhone, Android Tablets, iPad etc.)

This article is based on using the iPhone 7 and screen shots replicate Google Maps application that is available on iOS platform. The interface of Google Maps might be slightly different compared to Android, but most of the functionality should remain the same.

Step 1:

  • Open Google Maps application by tapping on the App icon.
  • Once the Google Maps application is open, click on Menu icon that is available on left-hand top corner
  • The menu will slide from the left side of the screen.
  • One has to select on “Offline Areas” option
Step 2:

Offline Areas screen will appear where the user has an option to download a specific area according to their requirement.

A settings icon is available on Right-hand top corner which controls the Offline Areas information download

  • This screen will show you all the offline areas that you have downloaded so far so that it is useful to verify and use it at a later point in time. To download a new custom area, the user has to tap on “Custom Area” option.

  • Once the user taps on Settings icon user will be redirected to a screen where he/she can opt for Automatic or Manual Update for Offline areas.
  • Also, users can set their preference in terms of downloading information either by using Mobile Data, Wi-Fi etc.
Step 3:

  • To download a new custom area, the user has to tap on “Custom Area” option.
  • The user will be redirected to a screen where they can Zoom In and Zoom Out their selection and opt for the desired area.
  • Once the area is decided, user has to click on Download button
Step 4:

  • The user has an option to give a specific name for the custom area that they are downloading and save the information accordingly. This feature helps to maintain customized list according to user’s understanding and doesn’t have to follow any standard names that Google has to provide. Good job on that, Google Maps!
Step 5:

  • The download will be initiated and it will show you the total amount of space that is available on Phone memory and download progress is displayed on time to time.
  • The user has an option to Pause the download and continue later.

  • The user has an option to “Delete” an Offline area if they wish to.
  • Based on the settings, the user will be able to get updates on the areas that they have downloaded.

I hope this step by step guide has helped you to understand ” How to use Google Maps mobile application offline”.


Categories
Mobile

How to stop Saving Media automatically to your Camera Roll

With the help of internet and social applications getting in touch with like-minded individuals, this has become extremely easy. With the help of technology advancements, individuals can avail free video calling facility which is provided by “Apple”. On the flip side, if you have friends using Android phones a number of third party applications are available where you can chat and avail video calling facility. With third party applications all the media content that was transferred between your chats are stored automatically and in due course of time it will pile up and occupy most of your phone storage and lead  different issues.

This action is enabled and it is a user’s preference that can make the difference. The article will guide you in a step by step fashion to disable this option and no more media files that come from WhatsApp or Viber will be stored automatically. This will give freedom for the users to manage their phone storage smartly and also gives an option for the user to store only important images rather than storing all the unnecessary media content.

How To Disable WhatsApp Photo & Video Saving

  • Open WhatsApp
  • Tap on the settings icon (bottom right-hand corner). This will open up all the settings screen with
  • Tap on Chat
  • You will be able to disable the option for “Save Incoming Media”.

Following the above steps will make sure that all incoming media during the chats are not saved directly.

How to Save an Image from WhatsApp chat:

  • Open WhatsApp
  • Go into your chat lists
  • Tap one of the chat from the chat list
  • Tap on the image, a popup will appear with options “Save”, “Forward”, “Share”.
  • Tap on “Save” button and image is saved into your Photos

Disable Auto Media save in Viber:

Viber is one of the popular chatting application which is available  both Android and iOS platform. The user has an option to disable auto-saving of images into Camera Roll by following these steps:

  • Open Viber App
  • Tap on “More” icon (bottom right-hand corner). User will be directed to a screen where all the settings can be configured
  • Tap on Settings
  • The user has to disable “Save to Gallery” option.

Following the above steps will make sure that media content is not automatically downloaded into your Photo App.

If you are thinking only WhatsApp and Viber are actually automatically saving media content then you are wrong. A lot of third party apps actually have this option and I would recommend one to go through the settings tab of the downloaded applications and protect your privacy

Categories
AI & Tech

How to set PATH and CLASSPATH in Windows and/or Unix?

What’s the difference between these two terms that we always refer to?

In this article, let’s try to understand what these two variables are
• PATH
• CLASSPATH

PATH and CLASSPATH are two most important environment variables of any system and thus also comes in use in Java environment. These variables are use to locate the JDK binaries used to compile and also to run Java in Windows and/or Linux.  It is a known fact that whenever you are trying to set up a new environment ( for example: Java), it is very important to have right things at the right place.

In this context,

let us try to understand what these variables are ?

How do we need to set them up for the very first time?

Let us also explore on what happens if this important step is not done as well. Most common cause of dreaded error like java.lang.NoClassDefFoundError and java.lang.ClassNotFoundException is always an incorrect CLASSPATH in Java.

How to set PATH and CLASSPATH in Windows and/or Unix?

Let’s dive into setting up these variables then:

The very first thing is to fire up a Command Prompt on Windows or a Shell prompt on Linux to set these variables. Both PATH and CLASSPATH are environment variable and can be set using export command in Linux and using set keyword in DOS and Windows as shown below:

Command to set PATH in Windows

set PATH=%PATH%;C:\Program Files\Java\JDK1.6.20\bin

Command to set PATH in UNIX/Linux

export PATH = ${PATH}:/opt/Java/JDK1.6.18/bin

Mind you, in Linux the separator would be a colon (:) instead of semi-colon (;) in Windows.

Command to set CLASSPATH in windows

set CLASSPATH=%CLASSPATH%;C:\Program Files\Java\JDK1.6.20\lib

Command to set CLASSPATH in Unix/Linux

export CLASSPATH= ${CLASSPATH}:/opt/Java/JDK1.6.18/lib

Do ensure to include the current directory which is denoted by a dot (.) to be included in the CLASSPATH to ensure that it is needed to look in the Current Directory. (Let’s say if the same class/file/jar is available on a different folder structure then it will skip it and instead use the one available in the Current Directory.)

You need to set up your JAVA_HOME along with the other two parameters, namely PATH and CLASSPATH for your Java programs to work.

This is how you set your JAVA_HOME variable:

This is how you set your PATH variable, pointing to your JAVA_HOME variable.

CLASSPATH should be containing the locations to any jar(s) files that would be required within the compilation of your Java program(s).

Categories
Mobile

Free Video calling feature on WhatsApp Messenger

Most of us know that WhatsApp has gained huge popularity among the  customer base and has the capability to transfer more than billion message on day to day basis. After Facebook has taken over WhatsApp, the development team has introduced a number of features to make it undefeated compared to other communication/ messaging apps. As one of the software updates version no: 2.16.17 or any other further release allows users to utilize real-time bi-directional video calling feature with the existing WhatsApp contacts.

If we closely compare, real-time bi-directional video calling feature is similar to that of Apple’s Facetime calling feature. The only difference between WhatsApp video calling and Apple’s face time is that WhatsApp video calling is available in all the operating systems. I.e. iOS, Android whereas Apple’s Facetime is only restricted to iOS devices.

Bi-directional video calling feature is far better tuned by Apple’s Facetime compared to the WhatsApp video calling feature. Ultimately, it is easy to talk to your loved ones real time irrespective of their geographical location. Another advantage for users if they are already using WhatsApp and don’t own an Apple device, then they have nothing to lose as they can utilize WhatsApp video calling feature to talk to their friends and family abroad.

How to Download WhatsApp with Video Calling Feature:

If you are already a WhatsApp user then one has to install the updated software version so that video calling feature is enabled for them to utilize. If you are new to WhatsApp then you can go into Play store or App store to download the application to utilize this feature.For you to effectively utilize video calling features, one has to satisfy one clause and which is: both the users should have an updated version of WhatsApp so that they can connect.

How to Dial WhatsApp Video Call:

  1. The user has to open the app and search for the contact from the list or user can search for a contact from the chat list or from favorite’s section/ calls history etc.
  2. Once the contact is selected you will get to see icon’s like “Chat”, “Call”, “Video Call”.
  3. Based on the selection, the user will be able to initiate a video call with the desired contact.
WhatsApp Video Call Facts:
  1. Once the call is initiated, the user has an option to switch cameras (i.e. Front, Back). Based on the selection user has a capability to showcase their surroundings. This feature is similar to that of Apple’s Facetime and you can switch your camera views with your call partner.
  2. If you only want to listen the conversion and have a noisy background you can always mute your line by tapping on “Mic” icon.
  3. You can straight away Decline an incoming video calling by tapping on “Red” hang up icon. This is handy when you are not ready to present yourself in an appropriate manner.
Categories
Mobile

Apple Support App is now available in the App Store

Support app from Apple? Yes, you have read it right. Apple has launched their much-awaited support app and currently is available only in Netherlands. Plans are being made to release it worldwide soon. Also, news is out that this support app will be included within the iOS built-in software. This app might be automatically added to your iPhone or iPad home screen as soon as you update your software to iOS 10.2 version

What to expect from the app?
  • This application is mainly built to address problems that the apple customers might encounter and provide round-the-clock support.
  • Users will get to know new product releases
  • Users can schedule appointments
  • Engage with Apple advisors and get their questions clarified via Chat
  • Resolve any problems with the new iPhones, iPads and other Apple devices
How to Download the Support App:

As this application is not available across worldwide, so we recommend to download the application from the (Link). If the application is available in your country then you will be redirected to a download page, if the application is not available in your country then users will get a prompt stating it is not available. We advise to  check this site regularly to make sure they can avail real time support.

Apple Support App Features:

Once you have successfully downloaded the application, login using Apple credentials to configure the app. With this authentication, the app will be available to all the devices associated to your account and display the information.

Once the products are listed out, users will be able to avail articles about using the device and relative iPhone features.

Chat:

Users will be able to initiate a chat with Apple representative and clarify their questions and seek advice if needed.

Schedule Call:

The user will be able to schedule a call with Apple representative to clarify their questions and also seek advice if needed.

History:

All the activities that user has initiated, i.e. Calls, chats and support requests are listed and historical data is available for your future reference.


Categories
AI & Tech

How to kill a Windows Service that is on Stopping state?

Ever wondered why your Tomcat/TomEE services are stuck at “Stopping” state even though when you have stop the service.  I am sure you have tired all bets to get it started again and didn’t succeed. Try this simple technique which will help you get started with no hassles.

Open your COMMAND PROMPT in Administrator mode

How to do this?

Go to Run, type cmd and right click on the ‘cmd.exe’ on the START menu screen to select ‘Run as Administrator’

After you  open the command prompt on Windows 7 and Windows Vista, fire the following query to check the PID associated with that WINDOWS service:

Check the service name of the service you want to kill from ‘Services.msc’. Double click the service and get the ‘Service name’ details from the popup and fill the following command with it.

sc queryex TomEE

Command to kill the service

taskkill /PID 2292 /F

With this you will be able to get yourself out of the issue of a Tomcat or a TomEE or any windows service that is hung on a ‘Stopping’ state for good.

Hope this helps someone with their problem.

Categories
Mobile

Fastest way to charge your iPhone?

It is interesting to know that the number of users utilizing iPhone has increased tremendously, thanks to the user experience and the usability of iPhone compared to other devices in the current market. With its wide range of mobile applications available for the users to use, it’s getting tough on a day to day basis to keep up with the battery levels for an individual.

As per the standard routine, Apple does release its successor every year and they have always increased the battery capacity and implanted techniques which reduce the use of apps when they are not active, but still, battery doesn’t last long even with iPhone 7.  If you are using previous versions of iPhone then it is even worse, the user has to charge their phone more than twice per day.

There are several ways to pump your iPhone batteries, few that I can think of as of now are:  charging through the wall-mount outlet, charging over USB, charging from a Power Bank.  I am sure by this time you are eager to understand the fastest way to charge your battery and ultimately aid your usability.

Wall Outlet:

Considered as the traditional way of charging your iPhone, by plugging into the wall mount outlet by using the lighting connector. This is the best and fastest way of charging your iPhone and usually, it takes more than 120 minutes for a full charge (i.e. if your battery percentage is less than 20%).

Computer USB port:

If you are in a place where you don’t have much access to a power outlet, you can connect your iPhone to your laptop or notebook via USB port using the lighting connector. This is not as good as the earlier option because of these reasons:

  • Laptop or notebook is busy in terms of providing necessary power to its internal components and cannot focus its strength to charge your mobile device via USB port
  • USB ports do vary based on the laptops and Notebooks that an individual is using. The Newer version of Laptops and Notebooks are far more efficient compared to the old.
  • If your Laptop has poor battery then ultimately it will not be of any help

Charging via Power Bank:

Charging your iPhone connected to Power Bank via USB port is as good as charging your device by connecting it to a Laptop, the only difference is that power bank is completely dedicated to charging your device. Usually, power banks are available in different variations and one has to make sure that they buy power banks with high battery capacity.

The fastest way to Charge your iPhone:

Out of all the above methods, the fastest way to charge your iPhone is by wall mount charger because it is a dedicated power source that targets only to charge your phone battery and nothing else. We recommend to use “Spike” with an inbuilt fuse which is the best way to avoid voltage fluctuations and individuals don’t have to worry about their device. To boost up the results if the user can turn on Air Plane mode while charging it will definitely show positive results because power utilization in AirPlane mode is considered to be very minimal compared to the normal mode.

If you are chilled out and don’t have anything to do over the weekend, we would recommend you to try these methods of charging to record the time and provide us your results under the comments section.

Note:
We recommend using only original Apple accessories to charge your device.


Exit mobile version